
Then she decided she wanted a "Dora" themed party.
Then "Princess"
Then a "Dora, Minnie Princess" party.
Ultimately she decided on a "princess" party.
I had a feeling this is the route she would take which was good, because I had "pinned" some cute princess cupcakes ~ cute and super easy!

Then, I made a mistake.
I asked a 2 year old, if she wanted cupcakes or a big cake for her birthday.
Of couse she replied, "A BIG cake Mama!"
Bring on the internet and the millions of princess cakes to go along with it!
I gave her 5 choices:
#1

#2

#3

#4

#5

Well, which one did she pick?
# 2
I admit, #2 was probably my favorite, but I was secretly hoping she would go for #3 or #5 as I figured they would be the easiest :)
And while I liked #2, the tiara wasn't my favorite, so once again, I relied on handy dandy google to see me through!
I ended up making a gum paste tiara using the template from this website.
The process I used was pretty much the same process she used.
I found an old utensil holder, taped my template onto it, then parchment paper over top of that.
I tinted my gum paste with pink gel color, rolled it into fairly thin "snakes" and placed it over my template. Having 2 templates is a great idea. One flat on your workspace to guide you and one taped onto your rounded object. To get the gum paste to stick to the parchment paper, I would dip a small paintbrush into water then paint the water onto the template before sticking the gum paste onto the template ~ it worked fabulously.
When I was finished, I set the whole thing aside to dry. The longer you give it to dry, the harder it will become (although after awhile the color does begin to fade a bit). Since my "snakes" were fairly thin, mine dried pretty quickly. I let it set for about 25 hours before putting it on the cake.
I thought it turned out GRRReat! (channeling my inner Tony the Tiger)

Now onto the cake


Seriously people.... If I can do it ~ so can you! :)


I did 4 layers total
2 ~ 9" round cakes one of each white and chocolate cake
2 ~ 6" round cakes one of each white and chocolate cake
For the white cake, I used a recipe I had seen on pinterest called ~ Wedding Cupcakes. Obviously I didn't make cupcakes, but I used the same recipe. It was a really easy recipe ~ basically you doctor up a boxed cake mix.

And the end result was fantastic! My kids LOVED it! They said is tasted like yummy marshmallows! Definitely a recipe I will remake!


And the end result was fantastic! My kids LOVED it! They said is tasted like yummy marshmallows! Definitely a recipe I will remake!
The chocolate cake cake was also a box mix. I doctored it up like I typically do ~ Add follow the directions on the box, but add in and additional egg, 1 small box of instant chocolate pudding and 3/4 cup of sour cream. The result is a super moist, delish cake! A favorite at our house.
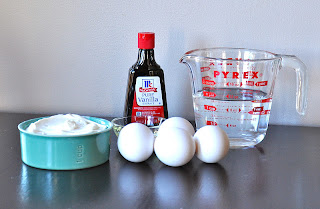
Between all of the layers and for the "crumb coat" before I put the fondant on, I used my very easy "go to" Vanilla Buttercream Frosting recipe.
Vanilla Buttercream
Ingredients:
- 3 cups confectioners' sugar
- 1 cup butter
- 1 teaspoon vanilla extract
- 1 to 2 tablespoons whipping cream
Directions:
In a stand mixer fitted with a whisk, mix together sugar and butter. Mix on low speed until well blended, then increase speed to medium and beat for another 3 minutes.
Add vanilla and cream and continue to beat on medium speed for 1 minute more (you can add more cream as needed to get the consistency you want)
~~~~~~~~~~~~~~~~~~~~~~~~~~~~~~~~~~~~~~~~~~~~~~~~~~~~~~~~~~~~~~~~~~~~~~~~
I put the cake together with the buttercream ~ alternating layers (and no making fun that they aren't even ~ they still taste good!!!).

Then covered the 9" layers with Marshmallow Fondant (recipe found here)
And then the 6" layers.
Next, I stacked them up.
Colored some of the left over fondant with gel colors and decorated it in a similar pattern to our "idea cake", by cutting out circles and stripes, rolling little balls, and by making more "snaking" to use as trim and flowers.
The result:
A DELICIOUS cake fit for a princess!


Seriously people.... If I can do it ~ so can you! :)

10 comments:
Fantastic! So pretty and tasty looking. Would love for you to share this at my Craftastic link party:)
oh my word Wendy! you did amazing!
Wendy... that is the cutest cake ever! Beautiful job! And it looks delicious too! :)
oh my goodness, this is fantastic! Great job!
Oh my goodness that is AMAZING!! you did such a fab job. That is one lucky little girl!
so glad you linked up!!!
xoxo
Cami
Holy smokes I miss one week over here and you start making amazing princess cakes?!?
Amazing!
Did you win the Best Mom Ever award from your daughter? That cake looks amazing!
You are so talented!
Wow that is seriously a beautiful princess cake! Makes me hungry!
Post a Comment